All Screwed Up

Dedicate an entire weekend to a project, and you just might get something accomplished! Of course, I thought I got more done than I really did, but more on that in a moment.
On Saturday, I laid out the window seat parts on the floor of the garage and finished my plan for the assembly. (Considering all the non-project stuff I had to do Saturday, I was lucky I got that much done.)
Sunday afternoon, though, was a bigger story. I routed rabbets in the bottom of the box to accommodate the vertical sides and center support. (Every time I get out the router, I have to reacquaint myself with its operation. This is very frustrating, because it takes so much time away from actually doing the project. But it prevents me from making stupid mistakes--well, at least it prevents me from making really stupid mistakes!)
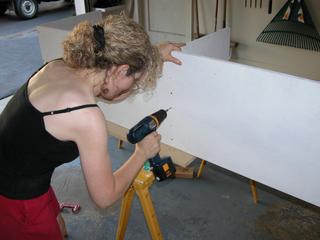
Next step was to dry fit the base, side and center support panels, and the front and back. It all looked good, so I then proceeded to glue and screw the three panels. This time, I successfully maneuvered the caulk gun, with a little help from my hubby to get the darn thing started. No Liquid Nails on me or the floor :-)
After letting that set, I dry fitted the front and back pieces. They fit remarkably well for an amateur. Everything squared up, so I glued and nailed them in place. Well, I glued and nailed one of them--the other just got nailed because I simply forgot to apply the glue til I had set the nail heads! I wasn't about to dissassemble that.
The only casualty in the whole affair was my left hand middle finger knuckle. I was so excited about finishing the nailing of the last piece that I got a little slap happy with the hammer. Nothing like whacking your knuckle instead of the nail!
At any rate, I was pleased with the progress. But today, after discussing it with a colleague who's much more experienced with woodworking, I realized that I need to go back and add some things before proceeding to installation of the carcass. He told me I really should add 2x4 supports in each corner of the box as well as some 1x4 pieces below the lid on each side of the seat. Knowing that this will be used by a teenager, I want to do everything I can to ensure it is strong and stable. So I will take two steps back to fix that omission. Then I can go on and secure the seat to the 2x4 frame that's already in place. After that, it's the top!


0 Comments:
Post a Comment
<< Home